|
|
Basket
0 items, £ 0.00
In this section...
Embroider on a Mouth
I know that some knitters dread the sentence “With a length of Black DK yarn, embroider on a mouthâ€. I too used to find it tricky to embroider a pleasing looking mouth so I do know how it feels when you have concerns that you are about to spoil your hard work with a wonky smile.
I use a technique based on the Lazy Daisy embroidery stitch.
So, the yarn is already secured under the hairline or at the bottom of the head somewhere out of sight. Bring the needle out to where the first corner of the mouth should be.
Then put the needle back into the work, where the second corner of the mouth should be, but importantly, exit the work two or 3 rows down from the corners of the mouth and at the centre point.
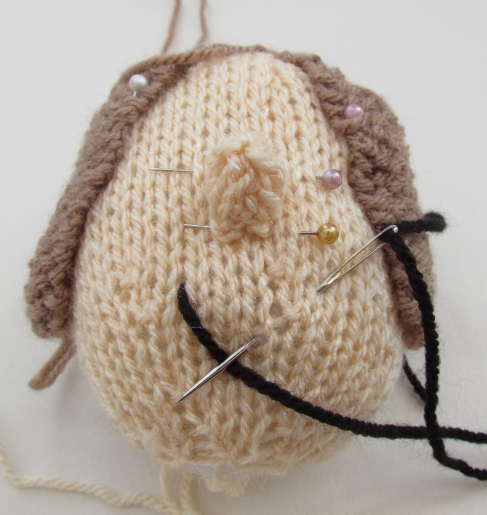
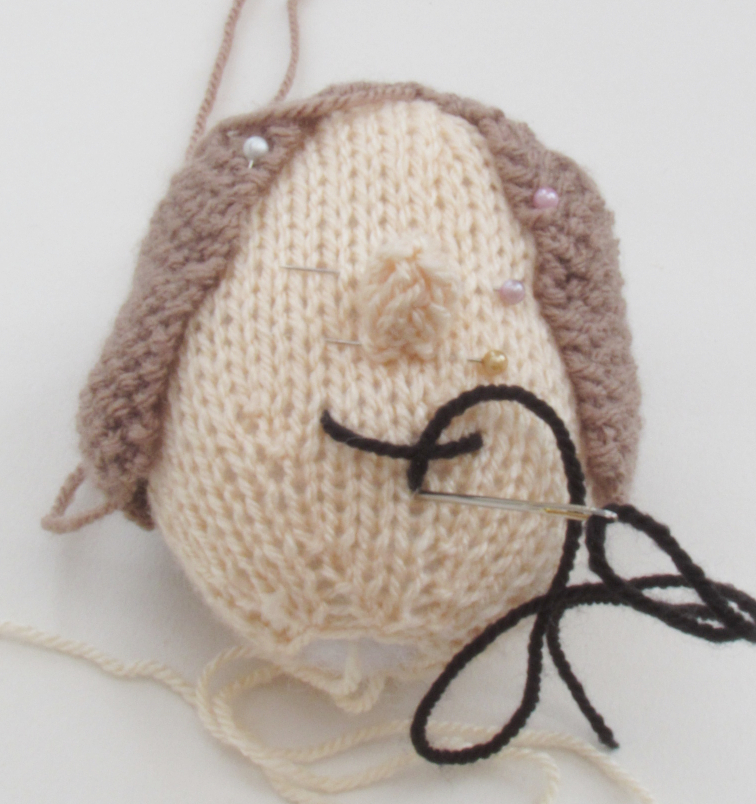
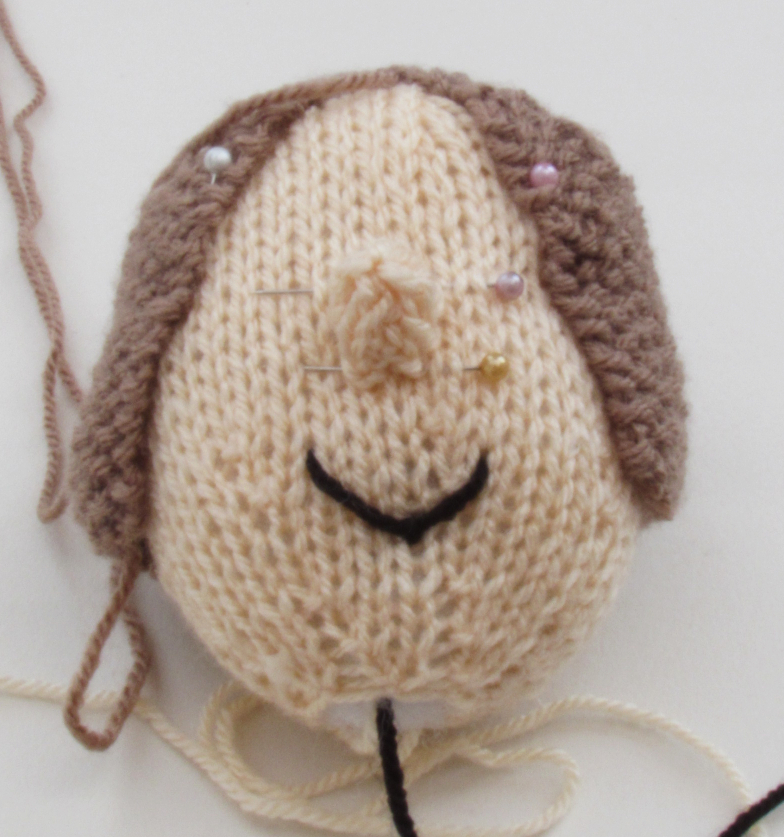
Lightly pull the thread through until the loose stitch makes a pleasing curve. And then, with your needle going over the stitch, put the needle back down the same hole to secure the stitch. Don't pull too hard or the mouth shape will change.
Secure the yarn somewhere un-noticeable.
Tags: